Sunday, September 22, 2013

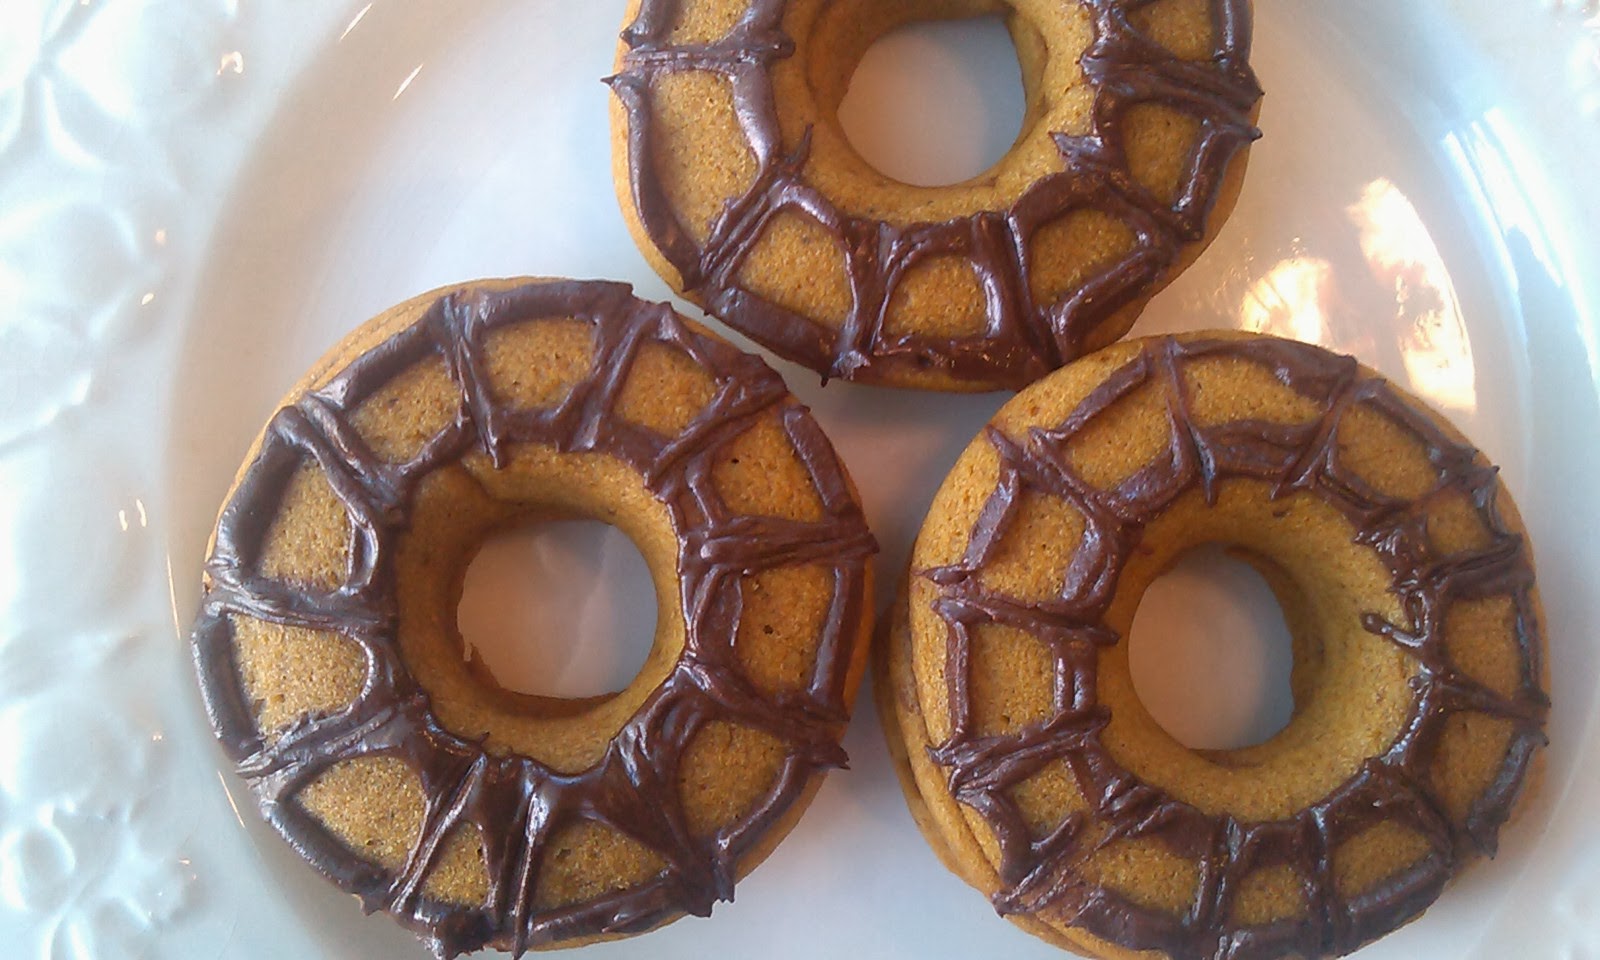
Pumpkin Donuts


Here are some Sunday morning Fall donuts!  

A touch of pumpkin with a hint of cinnamon and nutmeg.  You don't have to feel guilty about enjoying one (or two) of these donuts since they are allergy free, baked and don't contain any refined sugar!         
(o.k., minus the icing.....:)   )
I made these very simple, but please feel free to kick them up a notch with adding in extras, like dried cranberries, chocolate chips, nuts etc.  
So grab your morning java or hot apple cider and celebrate the coming of Fall!


gluten free/vegan


Pumpkin Donuts:
Oven: 350 degrees
1 donut pan- greased
Makes: 6 regular size donuts or 12 mini donuts


1/3 Cup  Brown Rice Flour
1/3 Cup  White Rice Flour
1/4 Cup  Potato Starch
1/4 Cup  Tapioca Starch
1/2 tsp.  Xantham Gum
2 tsp.  Baking Powder
1/8 tsp.  Fine Sea Salt
1/8 tsp.  Ground Cinnamon
1/8 tsp.  Ground Nutmeg
1/2 Cup  Coconut Palm (sugar)
1/2 Cup  Organic Canned Pumpkin
1/4 Cup  Milk Substitute (I use Rice)
1/4 Cup  Coconut Oil (or oil of choice)
1 1/2 tsp.  Egg Replacer mixed with 2 TB warm water
1/2 tsp.  Pure Vanilla Extract

Preheat oven to 350 degrees.  Prepare donut pan and set aside.
In separate small bowl mix together; brown rice flour, white rice flour, potato starch, tapioca starch, xantham gum, baking powder, sea salt, nutmeg and cinnamon.  Whisking by hand, so well combined.  Set aside.
In large mixing bowl with paddle attachment;  add coconut palm, pumpkin, milk substitute, oil (my coconut oil was soft enough not to melt), egg replacer and vanilla.  Mix on medium speed until well combined, scraping down with a spatula when needed.  With mixer on low speed, slowly add in premixed dry ingredients.  Mix on medium until well mixed, scraping down when needed (about 2-4 minutes).
Once blended together scrape batter into heavy duty ziplock bag.  Snip a tiny portion of the tip off and squeeze batter into donut pan filling 1/2 to 3/4 full.  You can smooth the top of batter with a wet spoon if lumpy.  Bake regular sized donuts 8-10 minutes and mini donuts 6 minutes.  Toothpick should come out clean when tested.  Let cool and remove from pan.


Spider Web Chocolate Icing:

1/4 Cup  Enjoy Life Chocolate Chips
1/2 TB  Coconut Oil

Once donuts have cooled.
In a small microwave safe bowl add the chocolate chips and coconut oil and melt on high, checking every 15-30 seconds.  Stir mixture after each "check" until melted completely.  Add melted mixture to a small ziplock baggie and snip a tiny portion of the end off.  Drizzle two circles on the donut.  One around the hole and one near the edge.  Using a toothpick, "pull" the chocolate outwards making a cobweb design.
Enjoy!


Spooky delicious!


Save and print!


Also shared at:Slightly Indulgent Tuesday,Tasteful Tuesday Party,Fat Tuesday,Allergy Free Wednesday,Gluten Free Wednesdays,Waste Not Want Not Wednesday,Gluten Free Fridays,Wellness Weekend


Thursday, September 12, 2013

The "Hair Bean"....


The Hair Bean!
You have probably by now seen this "As Seen On TV" product.  Let me tell you....it's the bomb!  If you have a kid with sensory issues you have to check this out.
My daughter, because of her Autism, wakes up each and every morning with a mass of tangles.  She has very fine hair, but a ton.   We have had many days where I would just let it go to give us both a break!  She would cry and scream and dread every hair comb-out session.  And I'm not kidding when I say "session".  I would use detangler spray, a brush and a pick.  And as gentle as I tried to be, it of course pulled and hurt.  
I struggled with making the decision of cutting her hair.  But then having sensory issues, getting it cut was another battle.  And her hair is beautiful....and she loves it long.  
My wonderful Mom (and amazing Grandma...) saw it at one of her favorite stores and ended up buying us 2 to try.  It looked odd, but we were willing to try anything at this point.  When we used it the next morning I was amazed!  It gently brushes through the hair.  It doesn't yank the hair, as the bristles are a soft plastic, and very small.  
It was almost funny to watch her just look glazed into the mirror as I first brushed because it actually felt good.  (A lot of people actually like having their hair brushed!)  She hasn't felt that since before her Autism.  It's been a long time!
And the best part is she said it made her "happy"!   She even uses it herself, which is HUGE for a kid with Autism.   
When her hair gets really bad (way worse than these pictures) I will still spray it with her detangler and sometimes use her small pick with the Hair Bean.  
My only complaints with it is that the shape of it (a bean) is hard to hold onto.  I drop that darn thing often while brushing.  And it could be a lot sturdier.  Ours hasn't broke, but it seems like it could easily.  My mom picked us up several more just in case they broke or wore out and we couldn't find them in the future.  She luckily found them for cheap!  
I hope this review of the Hair Bean is helpful.  I think anything that gives our kids a "break" is a good thing and we should spread the word! 


This is a mild "hair morning" for her.  Her hair is  
usually much worse than this.

before:


This is after using the Hair Bean.  I didn't need to 
use her detangler spray this morning, but after
I brushed it I ran some water over the top of 
the brush to "smooth" her hair down a bit.
(her top is different because she spilled on it
and had to change, but this is right after
I was done brushing it)

after:


This is what the package looks like without the brush in it.
Sorry, I forgot to take a picture with it in it!


This is what the brush bristles look like.  They are a soft plastic
tip.  But not poky by any means.  There is a small case that
it fits into with a tiny mirror inside.  


*note:   This is my own personal review and wasn't asked to do it by any company.

Tuesday, September 10, 2013

Pumpkin Cinnamon Rolls


I promised myself I wasn't going to do another pumpkin recipe until summer was officially over.....but I guess since technically it's only a few weeks away....what the heck! 
Pumpkin Cinnamon Rolls make a special treat for a (pre) fall morning.  My family loves them and since I don't make them very often, they are eaten quickly.  
This is a pretty basic recipe, minus the gluten, dairy, eggs, soy etc. (ha!)  But simple enough.  It would be wonderful for the holiday season ahead.  The pumpkin ends up adding a nice moisture to this batch, which is hard to do when you aren't using eggs.  
If you have trouble with nuts, leave them out.  You could always add in raisins, apples or cranberries instead.  Whatever you desire!  
Keep in mind with most all allergy free baking, baked good tend to dry out very quickly, so if you have leftovers feel free to pop them into the microwave and warm them up for a few seconds to soften them back up.   So grab a cup of warm cider and enjoy!


gluten free/vegan


Pumpkin Cinnamon Rolls with Maple Icing:
parchment lined baking dish, 9x9

3/4 Cup  Coconut Milk (carton)
1 1/8 tsp  Rapid Rise Yeast
1/4 Cup  Organic Sugar
1/4 Cup  Organic Pumpkin Puree (canned)
1/4 Cup  Butter substitute, melted  (we use Earth Balance-soy free)

3/4 Cup  Brown Rice Flour
1/2 Cup  White Rice Flour
3/4 Cup  Potato Starch
1/2 Cup  Corn Starch
1 1/8 tsp.  Xantham Gum
1/4 tsp.  Baking Powder
1/4 tsp.  Baking Soda
1/2 tsp.  Fine Sea Salt

Filling:
1/2 Cup  Butter substitute, melted (we use Earth Balance-soy free)
1/2 Cup  Organic Brown Sugar
1 1/2 TB  Ground Cinnamon
1/2 tsp.  Ground Nutmeg
1/2 Cup  Pecans (toasted) (save 1 TB to sprinkle on top once done).........*optional

Maple Icing:
1/2 Cup  Organic Powdered Sugar
1 TB  Butter, melted (we use Earth Balance-soy free)
1 TB  Pure Maple Syrup
1 TB  Coconut Milk (carton)

Preheat oven to 200 degrees.  Turn off.  Prepare baking pan with parchment.  Set aside.
In a small bowl, heat coconut milk to 110 degrees.  Add yeast and 1/4 cup of sugar to warmed milk, whisk together.  Let sit 5-10 minutes.  In large mixing bowl with paddle attachment, add pumpkin puree and 1/4 cup melted butter.  Mix well.  Add yeast mixture and mix on low until combined.  Next, add brown rice flour, white rice flour, potato starch, corn starch, xantham gum, baking powder, baking soda and sea salt.  Mix until well combined, scraping down when needed.  Remove bowl and cover with plastic wrap.  Place into warmed oven and let rise 1 hour.  Once risen, remove from oven and roll dough out on floured (I use white rice) surface with rolling pin. Roll out into a large rectangle (as thick or thin as you like).  Preheat oven to 200 degrees for next rise.  Turn off once at 200 degrees.  Next, spread filling ingredients onto rolled out dough.  Spread on melted butter, top with brown sugar, cinnamon, nutmeg and toasted pecans.  Using a metal scraper, roll dough into tube and slice into even "rolls".  Place into prepared pan, cover with plastic wrap and let rise 30 minutes in warmed oven.  Once the 2nd rise in done, remove from oven and preheat oven to 375 degrees.   Remove plastic wrap and bake rolls for 15 - 17 minutes.  While baking, make icing.  In small bowl mix together, powdered sugar, melted butter, maple syrup and coconut milk.  Whisk until combined.  Pour over freshly baked rolls and serve immediately!  Enjoy!


Time to roll up!


Glazed and waiting......


Save image and print!


Also shared at:
Fat Tuesday ,Tasteful Tuesday Party,Allergy Free Wednesday,Gluten Free Wednesdays,Waste Not Want Not Wednesday,Healthy 2Day Wednesday,Gluten Free Fridays,Healing With Food Friday,Slightly Indulgent Tuesday


Saturday, August 31, 2013

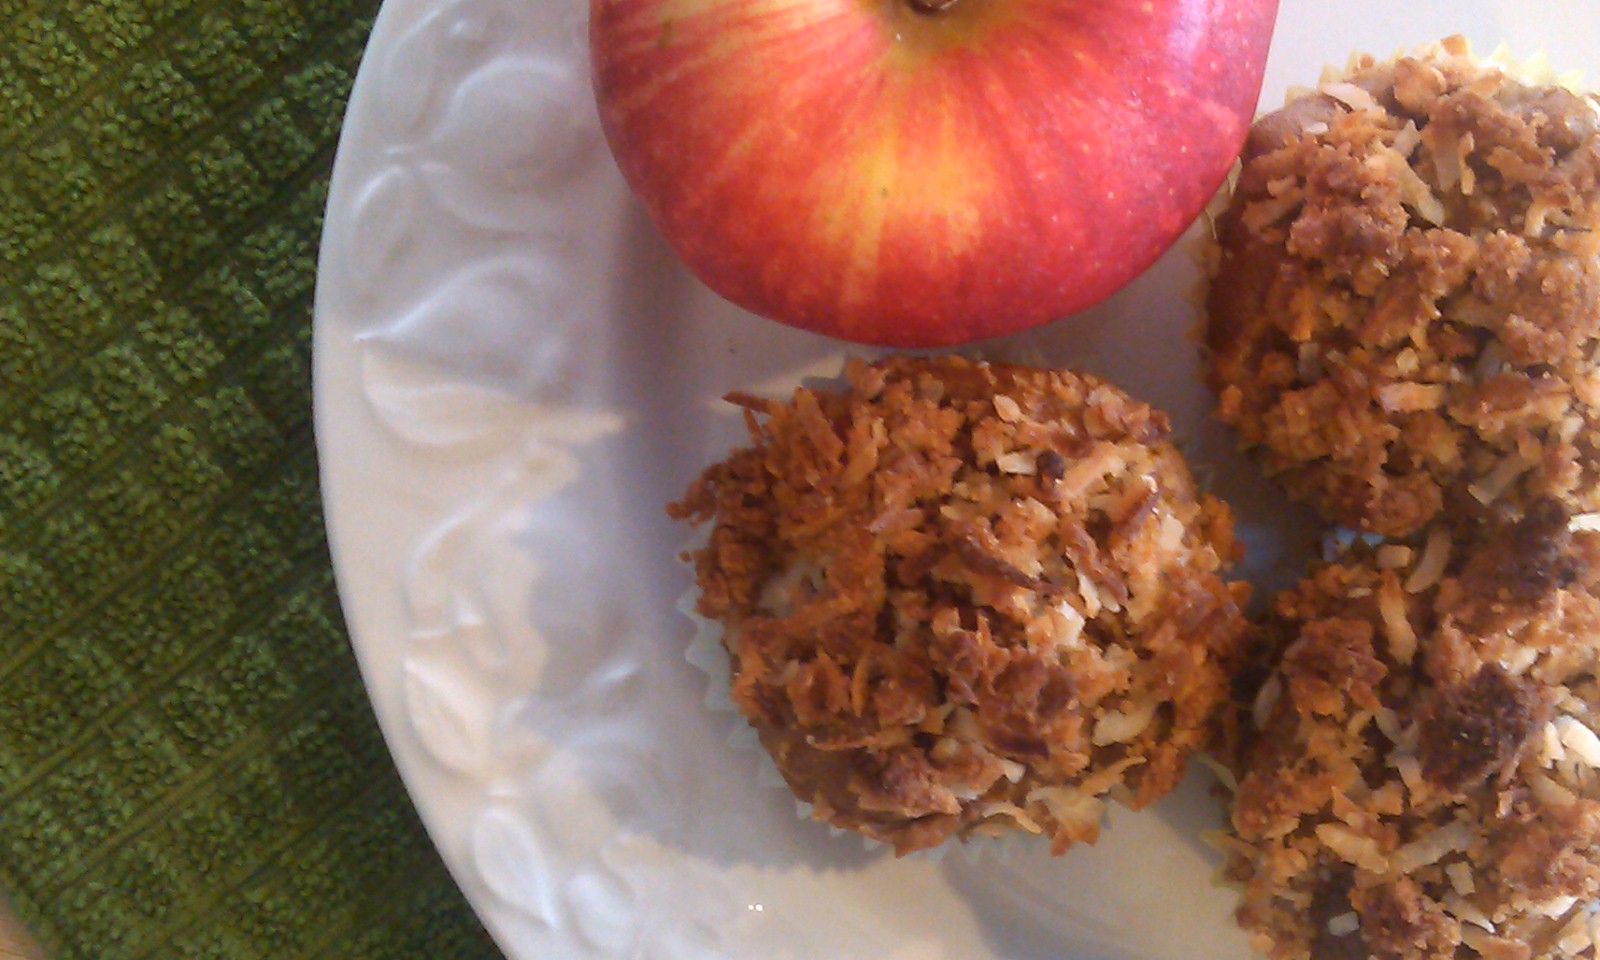
Coconut Crumble Apple Muffins


This particular recipe I'm going to dedicate to my oldest daughter......
She is a Fall maniac!
She has been anticipating Fall since last month.  You would think living in the Pacific Northwest we would want Fall to come as late as possible, while we stretch out the Summer!?  But you may be surprised to know that most people living in this state love Fall.  I mean REALLY love Fall! 
But once you have lived here, you understand why.  The beauty of the trees changing color, the drop in the temperatures and the smell of the air is comforting.  You know we are closer to kicking back in the house with a fire,  putting on warm and comfortable clothes and there are so many activities and holidays we are moving towards when Fall comes, it makes it pretty exciting!  
The funny thing is we are desperate for Summer to be here, but then after about a month, we are already looking forward to the next season.  
So I will call these my "pre-fall" muffins!  Just a hint of Fall while we wrap up the Summer.
These muffins are a combination of apples, pumpkin and a touch of coconut.  They are extremely moist and wont last long once you dig into them!  
My daughters love anything with pumpkin in it.  It really is a super food.  Pumpkin has such a slight flavor, but adds so much nutrition and moisture to recipes you can never go wrong adding it in.  And luckily the canned varieties are amazing.  I used Gala apples in this recipe because they are my favorite!  But you could use any variety that you prefer.  I also decided to add in toasted pecans, since my youngest daughters allergy to this is very low and it ended up being a nice addition.  But nuts can be a real problem for most, so don't feel like you can't take them out.  
I hope you enjoy this recipe and celebrate the coming of Fall as we are.  


gf/vegan


Coconut Crumble Apple Muffins:
oven 350 degrees
14 (lined) muffin tin


1 Cup  Brown Rice Flour
1/4 Cup  White Rice Flour (Sweet White Rice or Plain)
1/4 Cup  Potato Starch
1 tsp  Xantham Gum
2 tsp  Baking Powder
1 tsp  Baking Soda
1/4 tsp  Organic Sea Salt (fine)
1 1/2 tsp  Ground Cinnamon
1/2 tsp  Ground Nutmeg
1 1/2 tsp  Egg Replacer (mixed with 2 TB warm water)
1/2 Cup  Organic Unsweetened Applesauce
2 tsp  Pure Vanilla Extract
1 1/2 Cups  Peeled/Chopped Apples ( I used Gala, it took almost 2 whole large apples)
3/4 Cup  Organic Pumpkin Puree
1/2 Cup  Oil (Canola, Coconut or Olive)
1 Cup  Organic Brown Sugar
1/2 Cup  Toasted Chopped Pecans (optional)

Coconut Crumb Topping:

2 TB  Coconut Flour
1/4 Cup  Organic Brown Sugar
1/2 Cup  Organic Shredded Coconut (sweetened or not)
2 TB  Spectrum Shortening


Preheat oven to 350 degrees.  Line a 14 cup muffin tin(s), set aside.
Mix together the crumb topping first.  In small bowl mix together with spoon or fingers; coconut flour, brown sugar, coconut and spectrum shortening until a "crumb" is formed.  Set aside.
In a separate bowl mix together the dry ingredients.  Combine the brown rice flour, white rice flour, potato starch, xantham gum, baking powder, baking soda, cinnamon, nutmeg and sea salt.  Set aside.
In mixing bowl add;   premixed egg replacer mixture, oil and brown sugar and mix on medium low until will combined.  Add in applesauce, pumpkin, vanilla and chopped apples.  Mix on low until combined.
Add dry mixture into wet and mix on low, scraping down when needed.  Once combined add in the pecans last, and mix until just combined.
Fill lined muffin tins to the top and evenly sprinkle on the crumb mixture.  Place in preheated oven and bake for 24 minutes or until a toothpick test comes out clean.  Cool completely and enjoy!


Save image and print!


Save image and print!


Also shared at:
Slightly Indulgent Tuesday ,Tasteful Tuesday Party,Fat Tuesday,Tips and Tricks Tuesday,Allergy Free Wednesday,Gluten Free Wednesdays,Waste Not Want Not Wednesday,Healthy 2Day Wednesday
, ,Gluten Free Fridays,Wellness Weekend


Tuesday, August 27, 2013

Baked Potato Wedges


Simple and delicious.  
Crispy on the outside and soft on the inside!
You will enjoy this simple recipe over and over again.  Without the hassle of deep frying, it can't get any better than that!


gf/vegan


Baked Potato Wedges:
Oven: 450 degrees
Large baking sheet: lined with parchment paper

6 - 7   Russet Potatoes- scrubbed clean and dry

4 TB  Brown Rice Flour
2 TB  Tapioca Starch
1/8 tsp.  Xantham Gum
2 tsp.  Garlic Powder
2 tsp.  Onion Powder or Bits
2 tsp.  Paprika
1 tsp.  Sea Salt
1 tsp.  Black Pepper

4 TB  Olive oil

Preheat oven to 450 degrees.  Line a large baking sheet with parchment paper and add the 4 TB of olive oil, spread around.  Set aside.
Cut each potato into 8 even wedges.
In a food processor or mini chopper, combine brown rice flour, tapioca starch, xantham gum, garlic powder, onion powder, paprika, sea salt and pepper.  Blend until well incorporated and pour into a large zip lock bag.  Adding a few potatoes at a time to the bag, seal and shake until wedges are completely coated with the dry mixture.  Shake off excess coating and place the coated wedges onto the baking sheet cut side down.  Place into oven and bake for 20 minutes.  Turn each wedge over and bake a additional 20 minutes until done.  Sprinkle with extra sea salt.  Serve hot and enjoy!


Save image and print!


Also shared at:Allergy Free Wednesday,Gluten Free Wednesdays,Waste Not Want Not Wednesday,Healthy 2Day Wednesday,Gluten Free Fridays,Wellness Weekend,Simple Meals Friday

Monday, August 19, 2013

Allergy Free Bread


This is a big one.

When it comes to allergy free bread, there are little to no choices to eat.  If the only obstacle for making and eating bread for my sweet daughter was just to be gluten free......(I dream).....life would be easier!
She has so many "main ingredient" food allergies it has been basically impossible to make something that was edible.  For years she only ate that one brand (don't want to name names) and suffered through.  It was basically cardboard shaped like a loaf of bread.  But without being able to eat eggs, dairy, soy, nuts etc. we were out of luck choice wise.
I started trying to make bread years and years ago that would fit her needs.  However, all the recipes I tried or tried to create were WORSE than that "cardboard loaf" we were buying!  I had never been a bread maker (the yeast variety) so it was a roller coaster of learning for me.  I couldn't even tell you how many loaves ended up in the garbage.  

This recipe has gone through a variety of changes.  Not just through changing ingredients and amounts, but also with water and oven temperatures and bake times.  Putting this recipe together has basically been a compilation of many recipes ending into one.  I wish I could claim this as my very own recipe, but I would be lying if I did.  It is a result of taking notes from every recipe I tried off of the Internet and out of recipe books, throwing out what I didn't like and keeping what I did.

Right now this is the bread we are sticking with.  It is easy to make, even with the yeast in it.  If you are a allergy free baker, you probably have all the ingredients on hand.  It really is delicious and makes a beautiful sandwich and toast.  A bread you can actually pack in a lunch and not have to heat in the microwave in order to eat!  I will be honest in telling you it last about a week before drying out. (It is homemade after all)  I have also doubled the batch several times and froze one of the loaves for future use, but it does come out pretty dry once defrosted.  I only do this when we are travelling and still would choose to eat this over the "cardboard loaf".  At home when it starts to dry out, I make bread crumbs out of in and throw them in the freezer for future recipes.  It works perfectly.  

I hope you enjoy this bread recipe as much as we do!  It is a staple in my recipe box.  I make at least one loaf a week since my daughter loves her sandwiches and I end up eating it as well.  And I would openly like to thank all those bakers before me who's recipes led me down the path of bread baking and helped me "create" a allergy bread that is worth eating!


gf/vegan


Allergy Free Bread:
Glass Pyrex loaf pan 8.5 X 4.5 X 2.5 inches

1 Cup plus 2 TB  Rice Milk
1/2 Cup  Water
1 TB  Olive Oil
3/4 Cup  Brown Rice Flour
3/4 Cup  White Rice Flour
1 Cup  Potato Starch
1/2 Cup  Tapioca Starch
2 tsp.  Xantham Gum
4 TB  Organic Sugar
1/2 TB  Sea Salt
1/2 TB  Active Rise Yeast

Grease one bread loaf pan, set aside.  Turn oven on and preheat to 200 degrees.
Warm rice milk and water to 120 degrees.  ( I use a microwave safe glass bowl and instant thermometer to do this quickly)  Add olive oil to warmed rice milk and water mixture, set aside.  In mixing bowl with paddle attachment, add brown rice flour, white rice flour, potato starch, tapioca starch, xantham gum, sugar, salt and yeast.  Mix on low so dry ingredients are well incorporated with each other.  Add in the warmed rice milk mixture and blend on medium/low for about 2 minutes. Scraping down with spatula when needed.  Spread into greased loaf pan and place in warmed oven.  Turn off oven once you place the bread dough into it.  Rise in warmed oven for 25 minutes.  Once risen, remove loaf and reheat oven to 380 degrees.  Your bread will raise a bit more while oven reheats. (I always place my loaf pan right over the burner that "releases" the heat from the oven to help with the rest of the dough rising while the oven is reheating)  Once the oven is at 380 degrees place loaf in oven with a "foil tent" over the top.  Bake for 10 minutes with the foil, then remove and bake for a additional 33 minutes.  Cool completely on a cooling rack before trying to remove from the loaf pan.  Store in a airtight container.  Enjoy!

*note- I have tried this recipe in a bread machine and had no luck.


Sliced and waiting for butter........


Save image and print!


Also shared at:Slightly Indulgent Tuesday,Tasteful Tuesday Party,Fat Tuesday,GF Tuesday,Tips and Tricks Tuesday,Allergy Free Wednesday,Gluten Free Wednesdays,Waste Not Want Not Wednesday,Healthy 2Day Wednesday,Gluten Free Fridays,Simple Meals Friday


Tuesday, August 6, 2013

Chocolate Tahini !


We love us some tahini!

When we discovered my youngest daughters peanut allergy (among most all other nuts and seeds) it was a hard time finding a replacement for our loved peanut butter.  Tahini was really one of the few substitutes we could use.  It was a long and slow process of getting my daughter use to the flavor.  I use to mix it with honey or maple syrup, anything to try and mask the bitterness and switch her over.  Once she adapted, we were able to use it just like you would peanut butter, which you don't realize until you take it out of your diet, that for kids we use it a lot!  Now she doesn't need it sweetened in any way, but loves it right out of the jar.  I normally make my own, which is a very simple process and far less expensive than buying it.  However, you can buy it at any super market now since it is so popular. 

I decided to put the Nutella spin on it and make her a special treat.  It drives me insane that most kids with food allergies miss out on all the fun extras of food.  Needless to say she loved this and ate a lot of it right out of the jar with a spoon.  Most times not to my knowledge!   

I have to apologize for the pictures on this recipe.  I hadn't refrigerated the mixture yet so it wasn't "set-up".  But it will thicken nicely if you don't have a kid bugging you for a taste a.s.a.p.!  


gf/vegan


Chocolate Tahini:

1/2 Cup  Tahini
2 TB.  Cocoa Powder (unsweetened)
4 tsp.   Coconut Palm Sugar
2 dashes  Salt
2 tsp.  Coconut Oil (not melted)

In a small mini-chopper or food processor, combine all ingredients and blend well.  Store in refrigerator.  Mixture will "set up" once completely cooled.  Enjoy!


Besides right out of the jar, my daughter loved it on her pancakes...........


\
\

This picture is before it was refrigerated, so the actual "end" product is quite thick.
I had to get the picture quick before some little fingers got into it!


Save image and print!


Also shared at:Gluten Free Wednesdays,Allergy Free Wednesday,Waste Not Want Not Wednesday,Gluten Free Fridays